![<?echo $_SERVER['SERVER_NAME'];?>](/template/twentyseventeen/skin/images/header.jpg)
Yesterday marked the first day of the Bubble Dress sew-along with Catherine guiding us through the initial steps. Today is the final day, where she’ll show us how to wrap things up beautifully. Thank you so much for joining us, Catherine!
Let's dive right into today's exciting part—creating the iconic "bubble" of the dress. First, take your skirt back pieces and ensure the center-back dot is clearly marked. Sew them together along the back seam, using a ½-inch seam allowance, until you reach the dot. Leave the seam open above it.
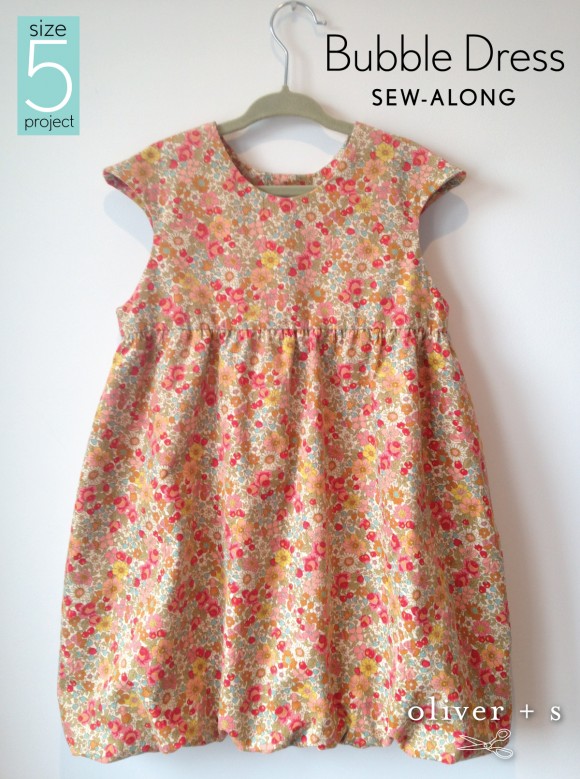
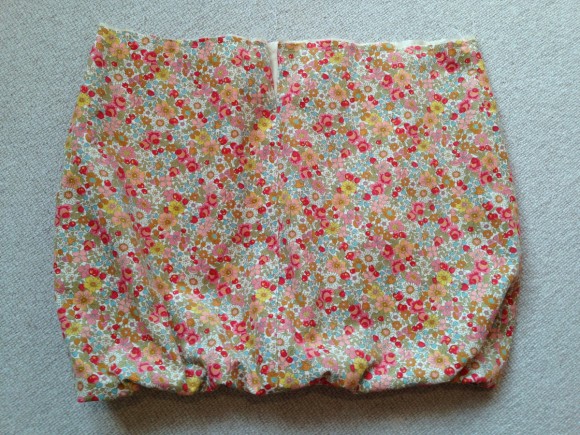
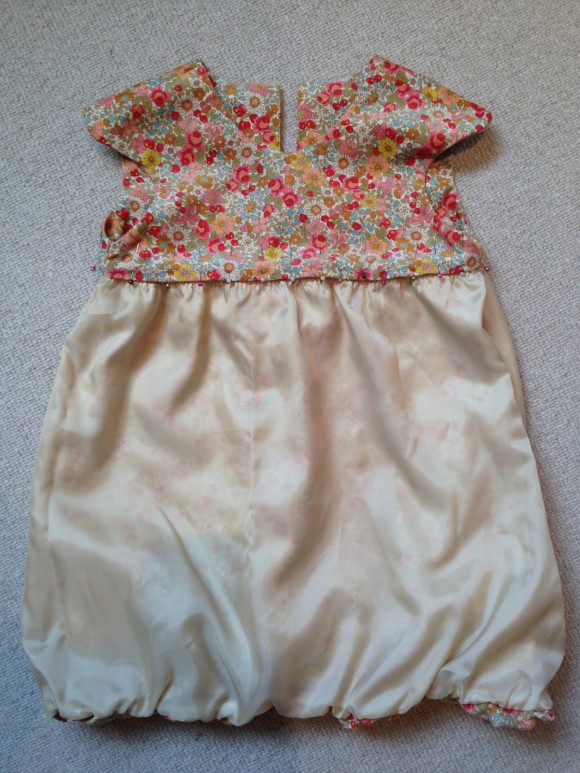
Here's a sneak peek of what we're working towards:
Welcome back to the Bubble dress sew-along! This is where the real fun begins. Take the skirt back pieces and confirm the dot on the center-back seam is marked. Stitch them together along the back seam, right sides facing each other, with a ½-inch seam allowance, stopping at the dot. Keep the seam open above it.
After pressing the center-back seam open, fold and press the edges above the dot to maintain the ½-inch seam allowance.
Next, pin and sew the front and back skirt pieces together along the side seams. For the non-scalloped version like mine, follow the detailed scallop instructions provided if you're going for that look. For this version, simply stitch and press the side seam open.
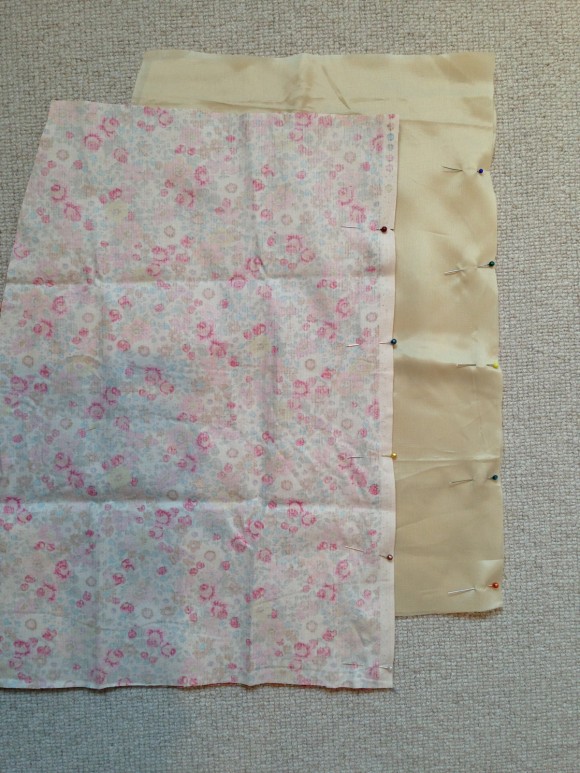
Sew and press the lining pieces in the exact same manner.
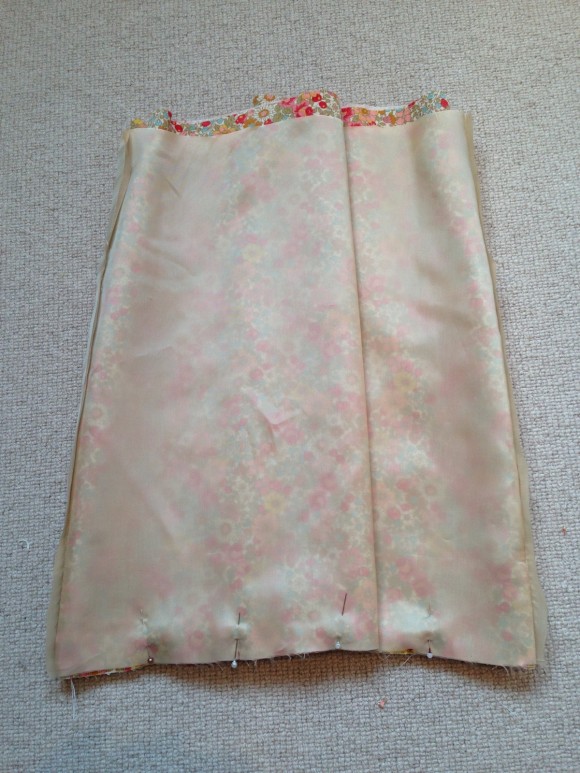
Flip the outer skirt so the right sides face outward, and do the same for the lining so the right sides face inward. Insert the skirt into the lining, ensuring the right sides are together, and align the side and center seams at the bottom edge. Don’t worry about the top edges—they won’t match yet. Pin and sew around the lower edge of the skirt and lining.
Fold the front piece to locate the center and either mark it or create a notch to help position the elastic in the next step.
Cut your elastic based on the size chart provided in the pattern—33 inches for size 5. Create a loop with the elastic and stitch the ends together using a narrow zigzag stitch.
Divide the elastic loop into quarters by folding it in half and marking the folds, then folding those in half and marking again. Ensure none of the folds fall on the elastic join, so they end up aligned with the seams.
Pin the elastic to the seam allowance at the side seam, center back, and center front, aligning the marks on the elastic with the seams. The elastic will be shorter than the lower edge of the skirt, so avoid pinning between the seams.
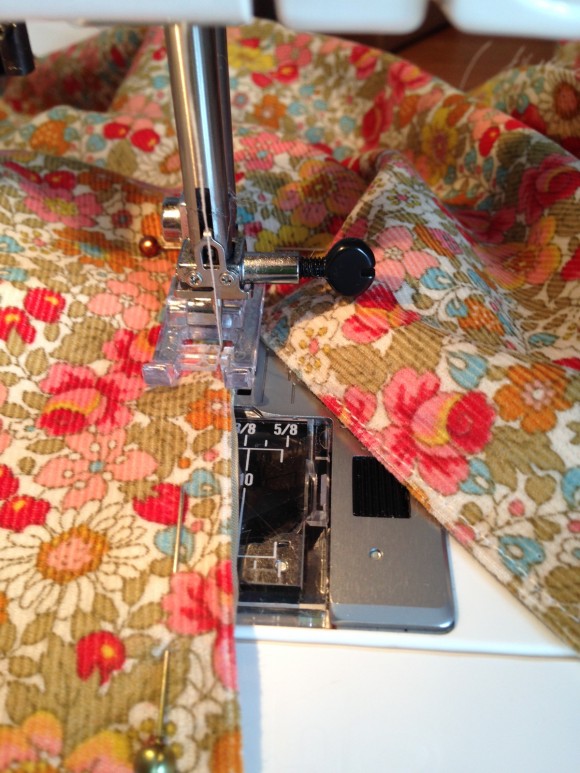
The next step involves stretching the elastic while sewing. It’s tricky to capture in photos because it requires both hands! Set your machine to a narrow zigzag stitch. Position your presser foot just before one of the pinned points where the elastic meets the skirt. Lower the presser foot and needle. Use your left hand to hold the elastic and skirt behind the presser foot and your right hand in front to hold the next pinned seam. Stretch the elastic until it matches the length of this quarter of the skirt's lower edge. Once stretched, it should sit neatly in the seam allowance. Sew along the elastic, securing it within the seam allowance. If you need to stop and reposition, always leave the needle in the "down" position.
Repeat this process around the entire edge of the skirt.
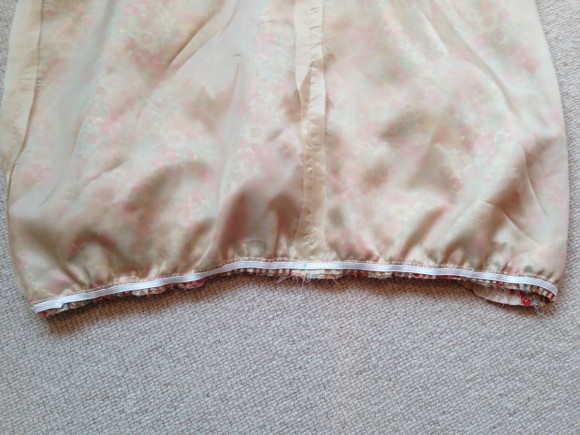
Ta-da! Flip the skirt and lining so the right sides are facing outward, and admire that beautiful bubble shape.
Align the top edges and pin the outer skirt and lining together at the back center seam, where you left the seams open above the dot. Sandwich the seam allowances between the two layers. Carefully edge-stitch around the placket, with the outer skirt facing up, sewing down one side and up the other.
Baste around the top edge of the skirt and lining so they can be gathered together as one layer.
Before gathering the upper edge of the skirt, mark the center front so you can match it to the bodice later. I use a small notch; it won’t be visible on the finished dress.
Now sew two rows of gathering stitches around the top edge of the skirt and lining, and it’s time to attach the skirt to the bodice.
Retrieve your bodice piece, which should be nicely pressed with the right sides facing out. Locate the little seam you stitched at the bottom of the back placket on each side of the back bodice, and fold it out to the wrong side again, revealing the dot (or cross, in my case) we used when stitching it yesterday.
Match the center-back edges of the skirt (where the outer and lining have been edge-stitched together) to the dots on the outside back bodice. The skirt placket should sit right next to the stitching line on the back bodice. I use plenty of pins for this step, as the fabric tends to shift easily.
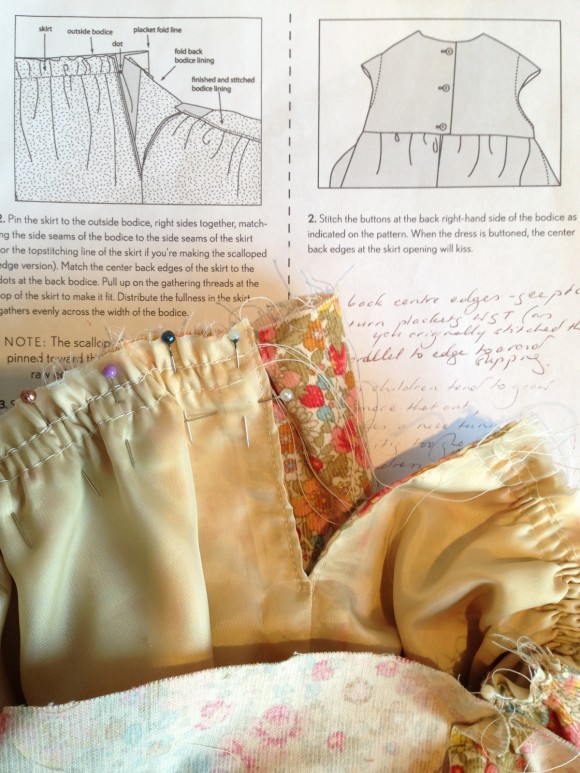
Gather the top edge of the skirt, matching the side seams and center front, with the right side of the skirt to the right side of the outer bodice. Stitch the skirt to the outside bodice at a ½-inch seam allowance, starting and stopping precisely at the dots where the placket seams begin (remember, pins are your best friends!).
Fold the bodice plackets back into place. The center-back seam of the skirt should now be sandwiched between the bodice and bodice lining, right next to the back placket.
Magic? I think so!
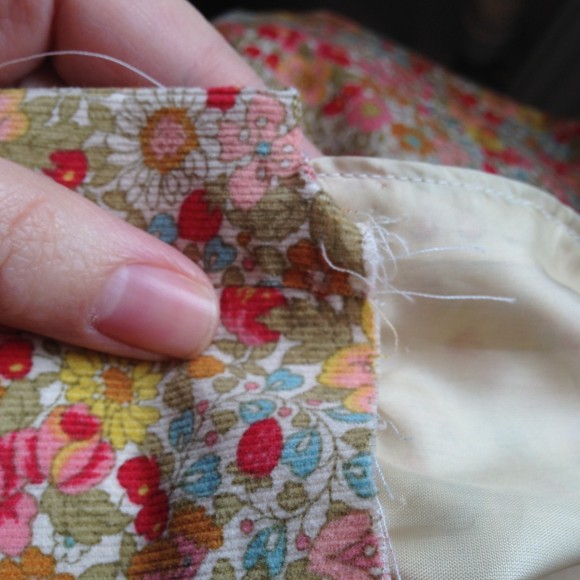
Fold the bottom edge of the bodice lining, pin it, and hand-stitch or edge-stitch it in place.
It’s buttonhole time! I love mixing and matching pretty buttons.
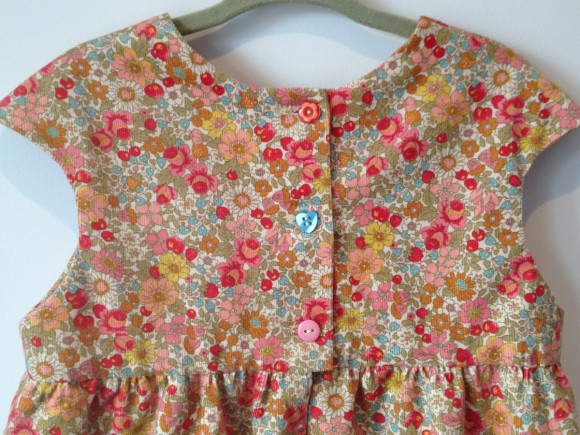
Sew the buttonholes on the back left-hand placket. Start with the top button to match the neck edges, then the bottom button to match the placket edges, and finally the middle button.
And we’re done!

I hope you’ve enjoyed sewing the Bubble dress as much as I have, and that your size-five will have loads of fun wearing it!
Stay tuned for more sewing adventures!
It is made of cotton material, so it will not make children feel stuffy and uncomfortable when wearing it. It has good moisture absorption and breathability, and it will not be wet and sweaty inside. It is super comfortable, and it is thick but not bulky.
In addition, we also have Baby Girls Jacket, Baby Girls Vest on sale, select high-quality fabrics, if you are interested, you can contact us. We can custom and wholesale Baby Girls Jackets & Coats.

Baby Girls Jackets & Coats,Kid's Camouflage Jacket,Kid'S Cotton Jacket,Kid's Safari Jacket
Dongguan Yumuran Garment Co.Ltd , https://www.1movingkidsjacket.com